Geeetech A30 Assembly09/08/2018
Assembling The Geeetech A30 3D Printer
This is the second in a series of reviews for the Geeetech A30 3D Printer. If you have seen my previous article "Geeetech A30 Unboxing And Walkaround", you will know the Geeetech A30 comes with minimal parts - which means minimal effort to assemble.We're going to show you in 3 easy steps how to get setup and ready to print with the Geeetech A30 3D Printer.
Easy as 1, 2, 3
It doesnt take much to assemble the Geeetech A30 3D Printer. We have broke it down into 3 easy steps to make things simple. You can also download the A30 assembly guide here.Step 1
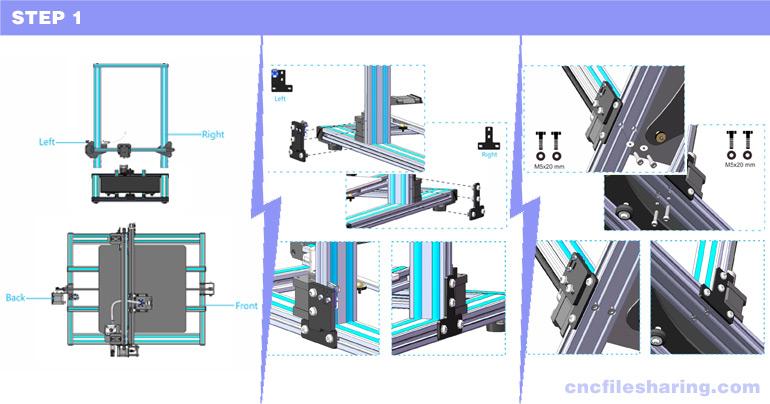
We first need to attach the Z axis "gantry" to the base. We do this by resting the Z axis on the base and using the supplied "T brackets" (one on each side) making sure you have the Z limit switch on the left side, simply slot them with there pre-installed t-nuts onto the profiles and tighten up.
With the Z axis now in place we have a little stability and standing up straight. Turning the printer onto its side, take 4 x M5 20 mm bolts and slot through the base extrusion up through to the Z axis "gantry" extrusion, 2 per side.
You can make sure your square by measuring the distance from the front or back on each side and again tighten up. Easy huh? That's the frame sorted.
Step 2
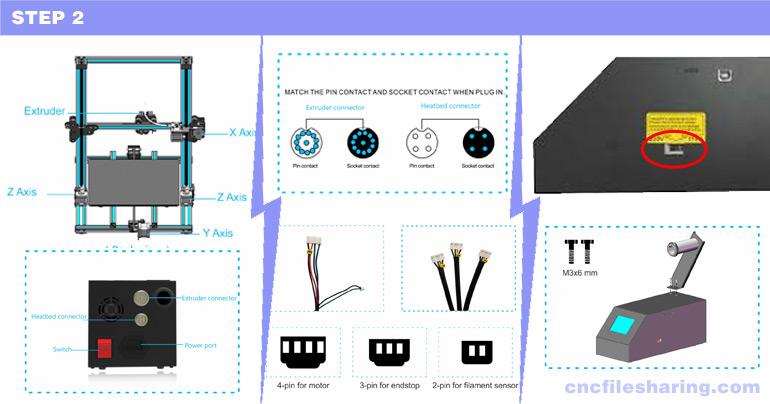
Now we have a frame to work with we need to attach all cables. The cables are clearly marked for each motor/sensor/switch and only go in one way so this stage as long as your familiar with the layout of the machine should be plain sailing.
I do stress though that the control box can only sit on the left side of the machine. I spent hours trying to make it sit on the right as I have my printer to the left of me in a corner. You really don't wanna see how I'm currently using it. I'm definitely in need of some extension cables. Any how I'll go into that more at a later date.
While we wiring its advised to check and select the right voltage for your country - this can be located on the side of the control box and is clearly marked with a yellow sticker, in the UK we set it to 240V.
Well where nearly there.. Now we just need to simply attach the spool holder to the top of the control box with 2 x M6 6 mm bolts and finish up this step.
Step 3
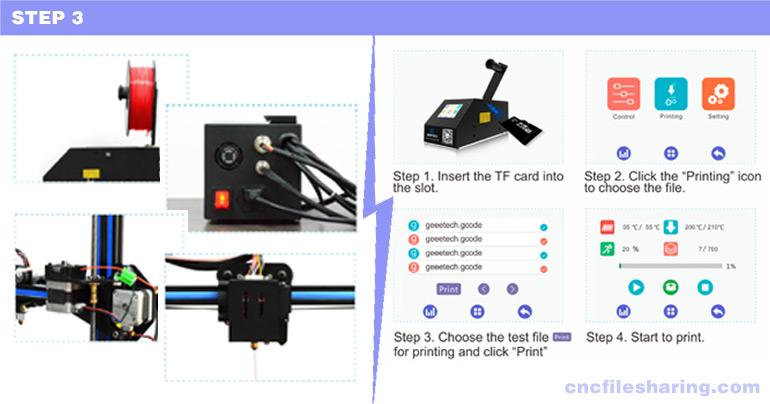
That's basically it. I do suggest doing a few calibrations and pre checks/print tests, but your pretty much ready to print.
You may have noticed i did not discuss the auto bed sensor. I personally prefer manual bed leveling - either way, manual or auto i do suggest you level your Z axis and bed at a minimum prior to printing.
Then my friend... Load up your favorite slicer, save some g and get printing.
In my next Geeetech A30 article, I will discuss a few of these basic calibrations and pre checks. For now, why not take a few minutes to watch the video below to get a better understanding of how the Geeetech A30 goes together.
Watch the Assembly video from my YouTube below and see how easy it is for your self!.
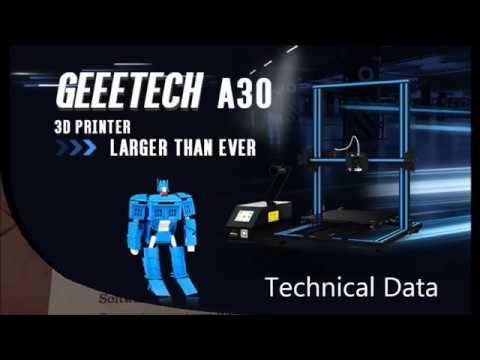
The full specifications for this machine can also be found below :).
Technical Specifications
Technology: FDM (Fused Deposition Modeling)Supported Filaments: PLA, ABS, PETG, HIPS, Wood
Build Volume: 320 x 320 x 420 mm
Connectivity: SD card, Wifi (optional)
Layer Resolution: 0.05 mm minimum
Printing Speed: up to 110 mm/s
Extruder System: Single Bowden Drive
Nozzle Diameter: 0.4 mm
Filament diameter: 1.75 mm
Heated Bed: Yes
Operational Extruder Temperature: max 250C
Operational Heatbed Temperature: max 110C
Input rating: 110V/220V AC, 50/60Hz
Printer Dimensions: 508 x 616 x 631 mm
4.0 out of 5 Stars
GET YOUR GEEETECH A30 3D PRINTER
Interested in the Geeetech A30?. Order yours direct from Geeetech here.Loading Comments!


